|

Knitting - Scenery
| site search by freefind | advanced |
Diary Page Links
All my diary pages going back to 2009
DRAWING & PAINTING:
Knitted scenery is our absolute favourite thing to make, and like real parks it can be quite shapeless and bumpy, all you have to do is dot some trees around to make it look real.
The park is really like a very large garden. You are very fortunate if you have a lovely stream through your garden!
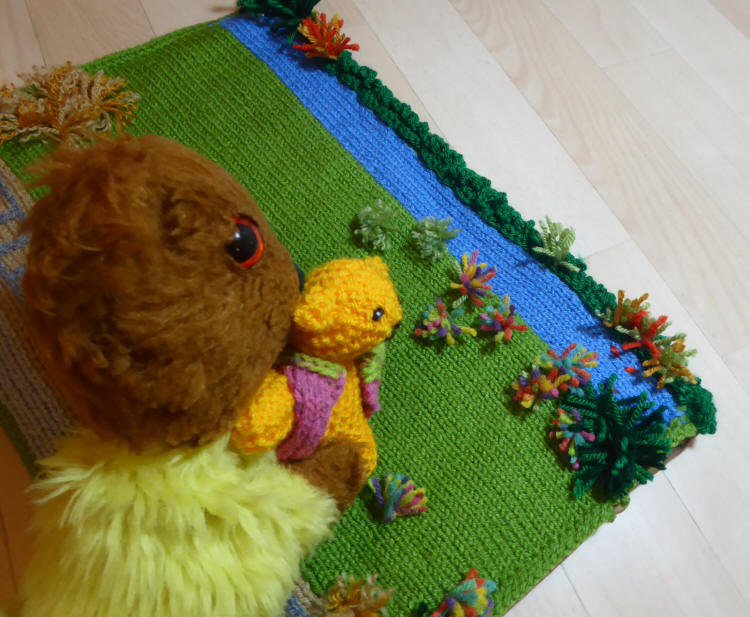
Here is a wonderful piece of park to play with, when you can't go out or if the weather is cold or rainy. The Tiny Teds can play here in complete safety. It is a large piece of green stocking stitch, with a blue stripe at one side. You have to twist the green and blue yarns round each other on every row, so that there are no gaps, or you could make separate strips and then sew them together. After that you go all round the four sides with a row of green crochet stitches to make a firm edge.
I like to use acrylic yarn, so it that it can be washed and dried easily. If you can't knit, you could use old green and blue jumpers, cut up into strips, and sew them together. Rather than make a really big park, you could make several smaller ones, so that you can rearrange them into different park shapes.
The little plants are bundles of short bits of yarn, tied very tightly round the middle with another piece of yarn. Pull the tying yarn ends through to the other side (going through two different holes in the knitting) and knot tightly. The bundle must then be sewn very firmly back and forth through the middle, in lots of different directions, with dark cotton thread. This makes sure the yarn bits can't be pulled out. Start with slightly longer bits for the bundles, then cut the plants down to size after they are sewn on, otherwise they are awkward to handle.
The outside riverbank has a few rows of loopy crochet up and down the length, so it looks like a little hedge of tangly wild plants.
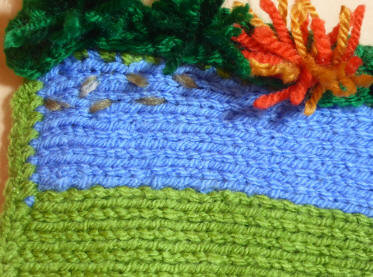
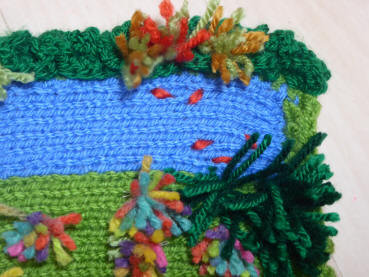
Here are some tiny fish in the river - tiddlers in grey and goldfish in orange. You have to split the yarn into a single hairy strand and just do two stitches per fish. Because the strand is hairy, it covers the background better than sewing threads and you can't see the separate stitches, it all blends in. All the knots are made at the back of the work. Give the fish some nice tall reeds in dark green to hide under! Goldfish only live in ponds in real life but I think they sometimes dream of an adventure swimming along rivers!
To make daisies and buttercups on the grass, do the same as with the fish, a single strand of white and yellow to make lots of dots.
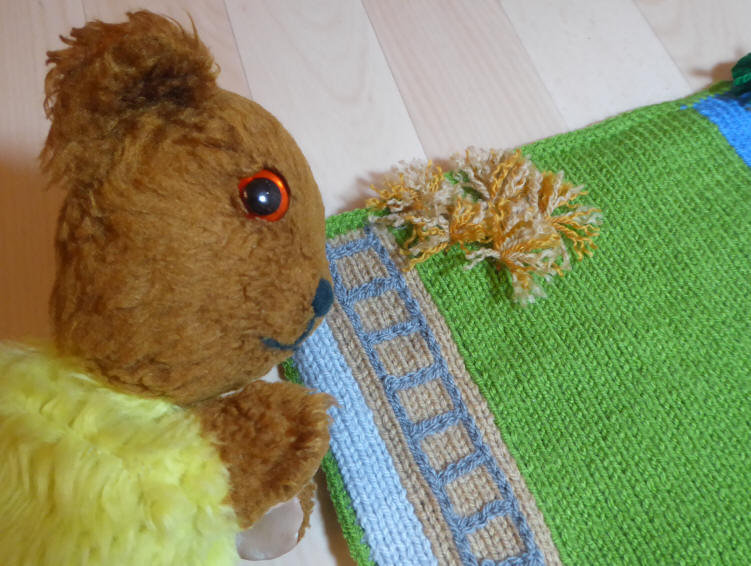
This side of my park has a track for a miniature train ride. There are stripes in light brown for the track gravel and grey for the platform. The train track was chain stitched over the gravel by hand, using a crochet hook, to make the rails, and then hand stitching for the sleepers. The plants here are weedy ones. Once the bundles are sewn on firmly, you separate the strands of yarn with the tip of a small knitting needle, so it goes fluffy and curly. If you sew a few little strands of green between the sleepers for weeds, it will give the station master some extra work to do clearing it up!
Once all the plants and decoration is finished, you need to sew the park to some backing material so that it lies flat and doesn't curl up at the edges. Tee shirt material is ideal, or recycle an old pillowcase. Cut the backing rectangle larger than the knitting. Make a neat hem on one of the short sides. Then pin the the material to the back of the park, turning under the other three edges. Sew the three sides with an overcast stitch to the crochet edging (you don't need to sew from the inside like clothes are made).
Now you have a sort of envelope and into that you put some card from a cereal box. You might need several sheets of card to make it really firm. On mine I put two buttons and loops to help keep the envelope closed. If the park needs to be washed in future, the card can come out, or be replaced if it has become bent.
Here's a very useful safety tip when sewing your toys. Keep the sewing needles and pins on another table, away from your project, until you need them. Then you count all the pins you are using for a seam before you start, and then count them again after you have sewn it and taken them out, to make sure it is the same number. That way you know that none of the pins has got lost inside the toy. This is very important to do every time.
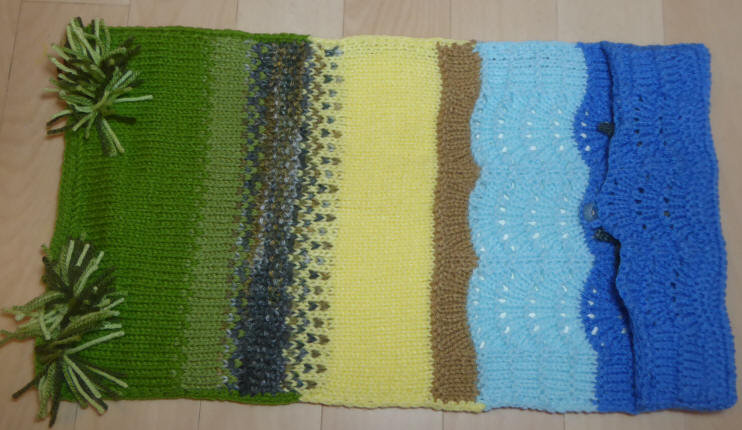
This almost the same as the park, except there is a special stitch pattern for the foamy waves, which I have given links for below.
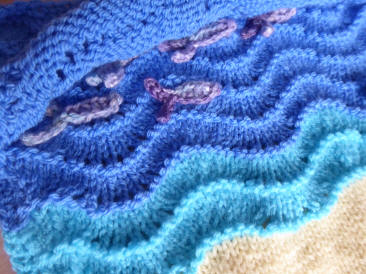
Waves You start with the dark blue in wave stitch, making four lots if incoming waves, then the same in light blue for the shallows. After that you change to normal stocking stitch. The brown is the wet sand, the light yellow is the dry sand. Then you do some rows with two colours, making dots of grey for the stones, then some Moss Stitch for the strips of stones, and finally, with great relief, smooth Stocking Stitch grass under our feet!
Moss Stitch is like this: Knit one, Purl one all the way to the end. On the next row, start with the same kind of stitch as the last one of the row before. If the last one was Knit then start the next row with a Knit. If the last one was Purl, start the next row with a Purl.
Waves Pocket Now you make an another blue waves section, starting at the bottom end as before. On the cast off row, make a small button loop in the centre of the row, by doing some extra stitch loops.
Sew the end and short sides onto the base piece. Sew on a little blue button in the middle, where the button loop is. This will keep the waves pocket closed.
Go all round the work with a crochet edging, and it is best to change colours as you go along, with green, brown, yellow and blue, so it all blends in. The dark blue end may have a wavy uneven edge, so when crocheting along that, do some short and some taller stitches (double, half treble and treble) to even it up and make the edge straighter.
Foamy Waves Pattern
There are several stitch patterns that can be used, Scallop pattern, Old Shale (or Old Shell) pattern, and Feather and Fan pattern. All these names sometimes get mixed up with each other, even though they are slightly different patterns, but they do all look like foamy waves. On my Sea I used three repeats of an Old Shale pattern across the row, to look like three waves breaking along the beach, and I used a 6-row repeat to space out the foamy edges of the waves. I had a wide plain border at each side so that it would lie flat.
Old Shale pattern can be found here:
https://www.knittingstitchpatterns.com/2014/09/feather-and-fan.html
and here: http://eknittingstitches.com/old-shale-stitch/
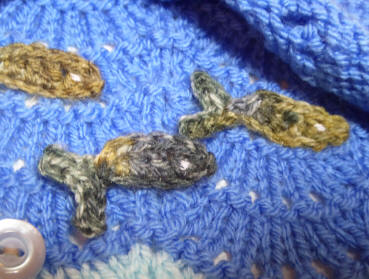
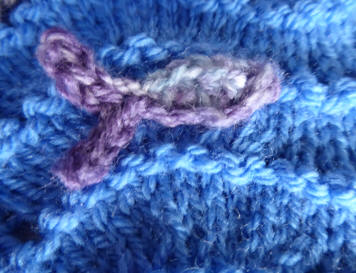
Sea Fish Inside the waves pocket go some crochet fish. I think they are herrings or mackerel. I used random coloured yarn in greys, so they look shimmery. You could use silvery or white yarn for shiny fish.
You start with a few chain loops and then single stitch down them, that makes half the tail fin. Then make a few more chain loops and single stitch down them for the second half of the tail fin
After that you make a longer chain for the length of the body. Work back along the chain with some short crochet stitches, a few higher ones (half trebles), then a few shorter ones, to give it a curved body. Now you have two yarn ends at the base of the tail. Weave them in with a wool needle, one at a time, in so that they disappear into the body stitches of the fish, and cut off neatly. Make little white eyes with white sewing thread.
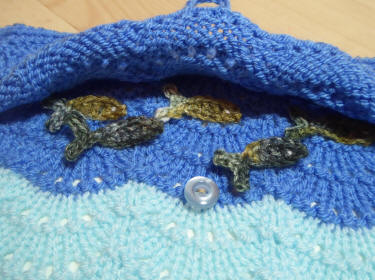
Sew each fish into the sea pocket, you only need a small stitch in the middle, so that they can still swim and move a bit. They are far too small to be allowed to stay loose.
The final job is to make a backing just like the Knitted Park above, and put in the cereal box card. Put the card in white side up, as it will show through the lacy foam waves, and look like more foam. Here I am helping Tiny Brown Ted go for a paddle, and won't he be surprised when he finds the fish in the sea!
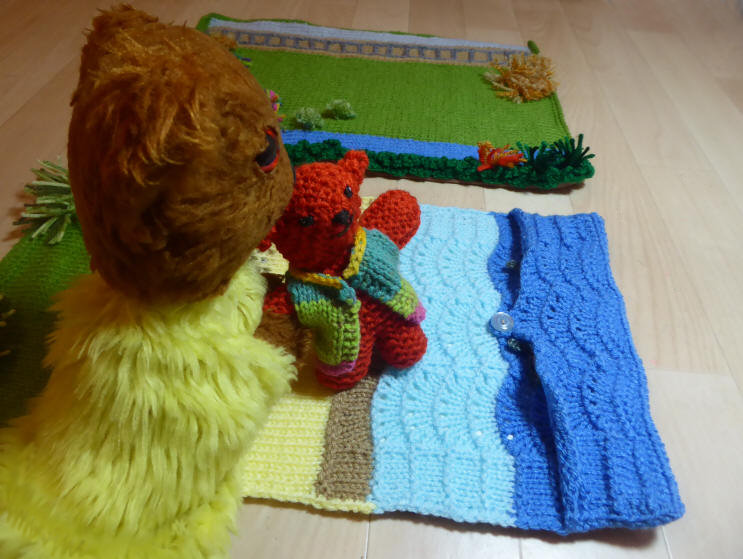
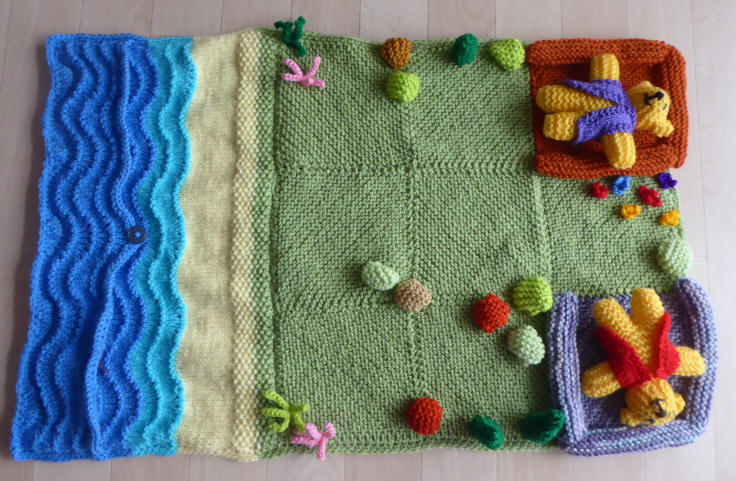
This park is by the sea with two places for the Tiny Teds to rest and shelter from the winds. They could have folded card over them to make a roof.
More herrings/mackerel/sardines in the buttoned pocket.
You can use the space on your 404 page to help find missing people by embedding info from notfound.org See Yellow Teddy's 404 page
Where to report a lost or found teddy or
toy in
the UK:
https://www.facebook.com/LostboxTeddyBears
All original material on this website is copyright © Beryl L Pratt and is provided for personal non-commercial home/church/club/educational use only, and may not be republished in any form. If you wish to share the content, please do so by a link to the appropriate page of the website.
Free statcounter from www.statcounter.com